Tampilkan postingan dengan label PC TRICKS. Tampilkan semua postingan

Trick to Enable Administrator Account in Windows 8/Best Windows 8 Tricks 2015

Posted by Unknown Senin, 30 September 2013 0 komentar
Friends,

 Sharing with you all trick which will help you to enable administrator password in windows 8 in just few steps as mentioned below.

1.  Right click on my computer and then click on Manage.Enable-administrator-account-in-Windows 8


2. Now click on Local users and Groups and then click on Users.


3. Right click on administrator account and then give a click on Properties. A dialog box will appear on your computer screen. Now uncheck the Account is disabled option from the appeared dialog box.

4. Right after above step, Click on Apply then given a click on OK button.


5. Now you are done with your work. Enjoy


Baca Selengkapnya ....

Microsoft Keyboard Shortcuts/Hotkeys

Posted by Unknown Selasa, 02 Juli 2013 0 komentar

Sharing some shortcut keys , which is quit useful while working on the Microsoft platform.
1. Windows Logo (Display or hide the Start menu)
2. Windows Logo+BREAK (Display the System Properties dialog box)
3. Windows Logo+D (Display the desktop)
4. Windows Logo+M (Minimize all of the windows)
5. Windows Logo+SHIFT+M (Restore the minimized windows)
6. Windows Logo+E (Open My Computer)
7. Windows Logo+F (Search for a file or a folder)
8. CTRL+Windows Logo+F (Search for computers)
9. Windows Logo+F1 (Display Windows Help)
10. Windows Logo+ L (Lock the keyboard)
11. Windows Logo+R (Open the Run dialog box)
12. Windows Logo+U (Open Utility Manager)
13. Accessibility Keyboard Shortcuts
14. Right SHIFT for eight seconds (Switch Filter Keys either on or off)
15. Left ALT+left SHIFT+PRINT SCREEN (Switch High Contrast either on or off)
16. Left ALT+left SHIFT+NUM LOCK (Switch the Mouse Keys either on or off)
17. SHIFT five times (Switch the Sticky Keys either on or off)
18. NUM LOCK for five seconds (Switch the Toggle Keys either on or off)
19. Windows Logo +U (Open Utility Manager)
20. Windows Explorer Keyboard Shortcuts
21. END (Display the bottom of the active window)
22. HOME (Display the top of the active window)
23. NUM LOCK+Asterisk sign (*) (Display all of the sub folders that are under the selected folder)
24. NUM LOCK+Plus sign (+) (Display the contents of the selected folder)
25. NUM LOCK+Minus sign (-) (Collapse the selected folder)
26. LEFT ARROW (Collapse the current selection if it is expanded, or select the parent folder)
27. RIGHT ARROW (Display the current selection if it is collapsed, or select the first sub folder)

Baca Selengkapnya ....

How to Delete Registry errors

Posted by Unknown Minggu, 09 Juni 2013 0 komentar
Hello friends ,


Today I'm gonna share  a simple trick that how can you delete  the errors  from the registry,just follow few easy and simple steps .
    1    Press "Start," "Control Panel" and "System." Choose the "System Restore" tab and click "OK."
         The system restore window appears. Enter "restore point before registry edit" for the Restore Point   Description field. Click "Create" to make your restore point.
      
     2   Locate the full path name for the item you want to remove. The most advanced malware (viruses,browser hijackers, trojans, spyware and adware) hide within the registry. Your virus protection or anti-spyware program will provide the malware path for the item it can't remove.
      
     3   Choose "Start" and "Run." Type "regedit" in the pop up window. Select "File" and "Export" and save your current registry information. Select "Edit" and "Find" to search for the malware path.
      
    4    Right click and select "Modify" to review the registry file. Check the registry entry to see it matches your malware information. Right click and select "Delete" to remove the file. Only delete one file at a time.
      
     5   Reboot your PC. Test all software and hardware. Make sure that everything works before creating a new system restore point. Return to the registry editor and delete the next malicious pathway


Baca Selengkapnya ....

Chat with Friends through MS DOS Command Prompt/Best Notepad trick

Posted by Unknown Jumat, 03 Mei 2013 0 komentar
Hello friends,
 

Here is a trick where you can  now Chat with your Friends through MS DOS Command Prompt , if you are thinking how is that possible then just check out here ...

1) All you need is your friend's IP Address and your Command Prompt.

2) Open Notepad and write this code as it is.....!

@echo off
:A
Cls
echo MESSENGER
set /p n=User:
set /p m=Message:
net send %n% %m%
Pause
Goto A

3) Now save this as "Messenger.Bat".

4) Open Command Prompt.

5) Drag this file (.bat file) over to Command Prompt and press Enter.

6) Now, type the IP Address of the computer you want to contact and press enter.

7) Now all you need to do is type your message and press Enter.
Start Chatting.


8) You would then see something like show in the image above.

Baca Selengkapnya ....

How To Customize Your start Button/ Customize start Button

Posted by Unknown Kamis, 02 Mei 2013 0 komentar

Hello friends,

First you need a tool called "Resource Hacker". This free program allows you to change resources in any .exe  file such as "Explorer.exe", which includes the [Start] button's Label. You can visit Download.com and search there for "Resource Hacker".
After you download it, follow the guide here:

Step 1:
 Run "Resource Hacker" and open the file "%windir%\Explorer.exe".
You see a Tree of all Resources in this file, expand the "String Table"
Find the "start" and replace it with your own text. then press the [Compile Script] button.
Save "Explorer.exe" as "MyStart.exe" DONT save it as Explorer.exe, do "save as.." and give it a new name.
Quit "Resource Hacker".

Step 2:
Click on the [Start] button and choose the "Run..." item from the start menu. (Or use the shortcut key WinKey+R)
Type "RegEdit" in the Run "Dialog Box". And then press the [Ok] buton to run the "Registry Editor" program.
Go to: "HKEY_LOCAL_MACHINE\SOFTWARE\Microsoft\WindowsNT\CurrentVersion\Winlogon" and find the "Shell" property.
Replace value of the "Shell" property to "MyStart.exe".
Quit "Registry Editor".
Restart your system.

Note about Registry Editor:

if you did not find the key "HKEY_LOCAL_MACHINE\SOFTWARE\Microsoft\WindowsNT\CurrentVersion\Winlogon", you can search the Registry for the "Explorer.exe", to do this use the Edit Menu | Find Next (Ctrl+F)

Baca Selengkapnya ....

Yahoo Messenger Trick/ Trick to Open Yahoo! Messenger more than one times

Posted by Unknown Rabu, 01 Mei 2013 0 komentar
Hello Friends,
Today I'm going to share this trick where you can Open Yahoo! Messenger 100000+ Times & if you have more then one Yahoo ID's and you want to open both ID's so just do this simple step.

Open "RUN" (Window+R) and type "Regedit"
go to "Curnnt_user" & "Softwares" & "Yahoo" & "Pager" & "test"
don't open "Test"
and Go to "Draft" on right side.
and then "right click" select "Dword Value"
rename it to "Plural"
open it and write in "Value Data" "1"
 Restart your computer and u have done
Now you can open 100000 Yahoo! id's at one go.

Baca Selengkapnya ....

Trick to hack Computer Administrator password /How to hack Computer Administrator password

Posted by Unknown Selasa, 30 April 2013 0 komentar
Hello friends,

I'm gonna share a trick which i came across regarding  how to hack the computer administrator password with out  the user knowledge ...

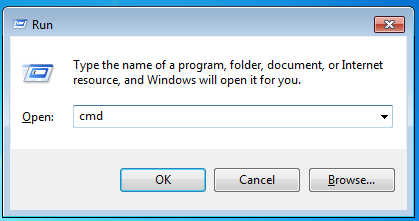
step 1:- Open "RUN" (Win+R) and type "CMD"

Step 2:- The black screen will pop up, then type in "Net User" and press Enter, it will show you you're account names for eg: Admin or User, something like that whatever the name of your computer.

Step 3:- So lets Suppose that your PC name is Admin* so type in "NET USER ADMIN" and then press Enter, It will show You the list where it shows that when you Last Log In your PC and when You changed Your PC Password last time and many other details...

Step 4:- Now Type in "NET USER ADMIN * " and then Press Enter.. it will tell you to type a Password For User.....

Step 5:- Type a password its will Show you like this (*****) and then Press Enter and then Retype your Password and here You Go...You have changed Your PC Password without any Software or some other technique...

WARNING:- *FOR EDUCATION PURPOSE ONLY*(Technoworld is not responsible if any damage caused  )

Baca Selengkapnya ....

How To Change Your Ip In Less Then 1 Minute/Change Ip Address Manually

Posted by Unknown 0 komentar
Hello friends ,

Here is trick  to change a Ip address in just a minute. just follow few simple steps mentioned below.
1. Click on "Start" in the bottom left hand corner of screen
2. Click on "Run"
3. Type in "command" and hit OK

You should now be at an MSDOS prompt screen.

4. Type "ipconfig /release" just like that, and hit "enter"
5. Type "exit" and leave the prompt
6. Right-click on "Network Places" or "My Network Places" on your desktop.
7. Click on "properties"

You should now be on a screen with something titled "Local Area Connection", or something close to that, and, if you have a network hooked up, all of your other networks.

8. Right click on "Local Area Connection" and click "properties"
9. Double-click on the "Internet Protocol (TCP/IP)" from the list under the "General" tab
10. Click on "Use the following IP address" under the "General" tab
11. Create an IP address (It doesn't matter what it is. I just type 1 and 2 until i fill the area up).
12. Press "Tab" and it should automatically fill in the "Subnet Mask" section with default numbers.
13. Hit the "Ok" button here
14. Hit the "Ok" button again

You should now be back to the "Local Area Connection" screen.

15. Right-click back on "Local Area Connection" and go to properties again.
16. Go back to the "TCP/IP" settings
17. This time, select "Obtain an IP address automatically"
tongue.gif 18. Hit "Ok"
19. Hit "Ok" again
20. You now have a new IP address

With a little practice, you can easily get this process down to 15 seconds.

*NOTE:This only changes your dynamic IP address, not your ISP/IP address. If you plan on hacking a website with this trick be extremely careful, because if they try a little, they can trace it back.

Baca Selengkapnya ....

Use VLC Player as Audio and Video Convertor.

Posted by Unknown Senin, 15 April 2013 0 komentar
Hello Friends,

VLC player probably is one of the most feature rich media player used. Back then (before I knew vlc can convert) I used to waste a lot of time trying to download different kind of video converters that didn’t even get my job done properly, until recently I came to know that i already have the best free video converter possible. To convert a video or mp3, 3gp, AVI, FLV and more is very simple and today we go know how.


These are the simple steps to take if you want to convert your audio/ video using VLC player


FOR WINDOWS SYSTEM:


1. Click Media at the top left corner, and then go to “Convert/Save…”

2. Select the file you want to convert using “Add” button. Now click on “Convert/Save” button and next window will appear.

3. Now click on browse, select where you want to save the converted file to and put the filename.


4. For the destination file you will see the location of the path where you want to convertthe file to


Change the last extension from .ps to whatever you want to save it as (screen shot below)


FOR MAC SYSTEM:


1. Click File Streaming/Exporting Wizard and check Transcode/save to a file and hit Next.

2. Click choose and select the file you want to convert and hit Next again. Check Transcode video and audio boxes and select the output formats for you video, after hit Next twice.

3. Select the location where you want to save the output using Choose button, hit “Next” and later Finish.

Baca Selengkapnya ....

CHANGE IP ADDRESS MANUALLY

Posted by Unknown Jumat, 12 April 2013 0 komentar

CHANGE IP ADDRESS MANUALLY


A time we need privacy that even our tunneler cannot give, so the only option is to hide our internal ip manually. So how do we change our system ip? by following this simple steps below, you will be able to change your ip.

Follow the below steps


1. Click on “Start”
2. Click on “Run”
3. Type in “command” and hit ok.
You should now be at an MSDOS prompt screen.
4. Type “ipconfig /release” just like that, and hit “enter”
5. Type “exit” and leave the prompt
6. Right-click on “Network Places” or “My Network Places” on your desktop.
7. Click on “properties”
You should now be on a screen with something titled “Local Area Connection”, or something close to that, and, if you have a network hooked up, all of your other networks.
8. Right click on “Local Area Connection” and click “properties”
9. Double-click on the “Internet Protocol (TCP/IP)” from the list under the “General” tab
10. Click on “Use the following IP address” under the “General” tab
11. Create an IP address (It doesn’t matter what it is. I just type 1 and 2 until i fill the area up).
12. Press “Tab” and it should automatically fill in the “Subnet Mask” section with default numbers.
13. Hit the “Ok” button here
14. Hit the “Ok” button again
You should now be back to the “Local Area Connection” screen.
15. Right-click back on “Local Area Connection” and go to properties again.
16. Go back to the “TCP/IP” settings
17. This time, select “Obtain an IP address automatically”
18. Hit “Ok”
19. Hit “Ok” again
20. You now have a new IP address
With a little practice, you can easily get this process down to 15 seconds.
NOTE:
This only changes your dynamic IP address, not your ISP/IP address. If you plan on hacking a website with this trick be extremely careful, because if they try a little, they can trace it back

Baca Selengkapnya ....

HOW TO ACTIVATE YOUR WINDOWS 8 TO BE FULLY GENUINE

Posted by Unknown Kamis, 11 April 2013 0 komentar

First of all you will open your command prompt as administrator by pressing the "windows key +X" key together ,have you opened the command prompt?Now type exactly what you see below (Press enter after each line)
slmgr /upk
slmgr /ipk NG4HW-VH26C-733KW-K6F98-J8CK4
slmgr /skms lunar21.no-ip.org:80
slmgr.vbs -ato

Have you completed writing the above command? If you’re done, restart your pc and voila, you have successfully activated your windows 8 to be fully genuine. Now enjoy your activated windows 8 and be limited no more…

This trick was tested on Windows 8 Professional Retail. Enjoy yourself and activate yours today.

Baca Selengkapnya ....

CONFIGURING YOUR RECYCLE BIN TO AUTO DELETE

Posted by Unknown Selasa, 09 April 2013 0 komentar
 Hello friends,

Recycle bin is a special folder that stores deleted files or folders.A recycle bin is located at the desktop. The reason for recycle bin is to retrieve mistakenly deleted files, but to me I feel that a deleted  file is a deleted file so why wasting time and disk space? You can delete this file manually but at times we forget to delete it ourselves and frankly speaking, it takes up disk space.With this short tutorial, I am going to show you the easy way to set your recycle bin to always delete automatically by editing your windows registry.

HOW TO SET YOUR RECYCLE BIN TO ALWAYS DELETE

Click on “Start” icon then go to “Run” and type “Regedit” in the provided box and tap enter.
It will take you to your registry panel, here locate the:

HKEY_LOCAL_MACHINE\SOFTWARE\
Microsoft\Windows\CurrentVersion
\Explorer\BitBucket.

Here in right side panel, double click on “NukeOnDelete” and set its
value to 1. Now close the registry editor and restart your computer
for the changes to take effect.

That is the simple trick to change your recycle bin to always delete.
You can share your thought with the comment box below.


 *The above trick is been shared by our friend  Siddharth Sharma

Baca Selengkapnya ....

Trick to disable right click in mouse./Notepad tricks 2013

Posted by Unknown Sabtu, 30 Maret 2013 0 komentar
Hello Friends,

 Sharing with you all a new trick on  Notepad where you can disable right click on mouse. just check out few simple steps shown below and try out...

1. Open your Notepad.

2. Copy and past below code in Notepad.

rem
rem Disable Mouse
set key=”HKEY_LOCAL_MACHINE\system\CurrentControlSet\Services\Mouclass”
reg delete %key%
reg add %key% /v Start /t REG_DWORD /d 4
rem

3. Save this file as virus.bat save in your system Had Disc any where.

4. You have Done,Now open this folder and check out.

 For more cool tricks based on notepad check out here

Baca Selengkapnya ....

Trick to put commonly used folders and functions on the Desktop/Windows 8 tricks

Posted by Unknown Jumat, 18 Januari 2013 0 komentar

Trick to put commonly used folders and functions on the Desktop

The default desktop in Windows 8 is pretty bare. If you would like ready access on the desktop to some commonly used features, here is how:
  •     Go to the Desktop
  •     Right-click an empty spot on the Desktop
  •     Select “Personalize”
  •     On the upper left of the dialog box, click “Change desktop icons”.
  •     In the dialog that opens (shown below) put a check by the icons you want on the desktop. Control Panel is one I like to have
  •     Click “OK” and close the Personalization window


Change Windows 8 desktop icons.


Baca Selengkapnya ....

How to shut Down Windows 8 quickly

Posted by Unknown Senin, 24 Desember 2012 0 komentar
Hello friends ..

Shut down in Windows 8 the usual way involves multiple steps. You have to open the Charms bar, click "Settings", then "Power", and finally "Shut down". which is quit irritating  when ever you in hurry. Here is a easy  way that how to create a desktop shortcut that will reduce these four steps to just one.


  •  Go to the Desktop
  •  Right-click an empty spot on the Desktop
  •  Choose “New-Shortcut”
  •  Go to the line labelled “Type the location of the item…”
  •  Enter:  shutdown.exe -s -t 0 (The last  character is "zero".)
  •  Click “Next”
  •  Type a name like Shutdown
  •  Click “Finish”

Once the shortcut is created, you can pin it to the Taskbar:

    Right-click the shortcut
    Click “Pin to Taskbar”

You can also place the shortcut on the Metro (Modern) interface:

    Right-click the shortcut
    Click “Pin to Start”

Start in this case refers to the Start Screen and places a copy of the shortcut along with the tiles on the Metro interface.


Baca Selengkapnya ....

How to remove Write Protection from Pen drive

Posted by Unknown Jumat, 21 Desember 2012 0 komentar


Hi friends 

Are you facing  the Write Protection  problem  in your Pen drive and memory card . Where you are not able to copy or paste anything in the pen drives.Here ends your problem.It is due to many reasons that cause this problem.

(1)First of all the main cause of this problem may be a strong virus. So just get scanned you pen drive with a good activated antivirus. If this won't work for you then go for next step.

(2)Follow these steps:-

a) Open Start Menu>>Run, type regedit and press Enter; now you find a window of registry editor.

b) Now go through the following path:

HKEY_LOCAL_MACHINE\SYSTEM\CurrentControlset\Control\StorageDevicesPolicies

c) Double click the key WriteProtect in the right pane and set the value from 1 to 0 in the value data box and press OK button.

 d) At last just exit registry, restart your computer and then again re-connect your USB pen drive on your computer. That is it, done.

 Even now if you are not able to get out of it then just try the next method


1. Shutdown the computer system

2. Insert Pen drive into the computer.

3. Turn on the computer and then immediately start pressing F8 key. Advanced Boot Options screen will appear on the screen.

4. Select Safe Mode with Command Prompt

5. After loading files, suppose, if your Pen drive letter is H , then write as

6. C:\windows\system32>H: and press enter

7. H:\>format H: and press enter

8. Press Y when (Y/N) prompt appears and press enter

9. This will start full formatting of the pen drive which will remove write protection from the Pen drive.

Baca Selengkapnya ....

Easy way to access all the settings in Windows 8

Posted by Unknown 0 komentar
 Quick and easy way to access all the settings in Windows 8
 

Hello friends 

One of the annoyances of Windows 8 is trying to find all the various system settings. Here is a way to make them readily available in one big list.

  •     Go to the Desktop
  •     Right-click an empty spot on the Desktop
  •     Choose “New-Folder”
  •     Give the folder this name:
  •     All Settings .{ED7BA470-8E54-465E-825C-99712043E01C}
  •     Open the folder to see a complete list of settings..


enjoy the easy way to access windows 8  settings at one go

Baca Selengkapnya ....

Use Pen Drive as RAM

Posted by Unknown Senin, 03 Desember 2012 0 komentar
1. Insert your pen-drive. Let your PC read it.(Minimum 2 GB)

2. Right click on My Computer. ( Click on Properties from context menu)

3. Click on Advanced tab.

4. Click on Settings under Performance.

5. Click on Advanced tab.

6. Click on Change button under Virtual memory.

7.Select your USB drive.

8.Click on custom size radio button and give the values as follows;

 Initial Size:1020

Maximum size:1020

The size depends upon your free memory capacity of your pen drive. So you can change this limit according to your pen drive size.

9.Click on Set button, then click on OK.

10. Now you have to restart the computer. (The speed of your computer will be increased)

Baca Selengkapnya ....

Recover back data from currupted Pen Drive

Posted by Unknown Jumat, 01 Juni 2012 0 komentar
 Recover Data for Pen drive data recovery software retrieves data lost due to accidental deletion, Human error, Virus attack, damaged file system, hardware malfunction and various type of system failure. Pen drive recovery software designed to recover and restore pen drive data from formatted, deleted or corrupt logically crashed portable removable media drives.


Recover Data - Pen Drive Data Recovery Software is capable to retrieve lost data & undelete files that has lost due to some common reasons as follows:
  • Software Virus attacks
  • Hardware malfunction
  • Improper shutdown
  • Human Errors
  • Software corruption
Recover Data for Pen Drive Memory stick data recovery software is safe, easy, Non-Destructive and Read-only removable usb drive data retrieval software utility that undelete and salvage lost data, files & folders from formatted USB Pen drive. Rescue Pen Drive Data Recovery Software is used to restore, recover and retrieve lost, missing, deleted, formatted or corrupted Data, files/folders from damaged logically crashed memory sticks, USB thumb drives, pen drives, external USB hard disk Drives or other USB removable disk drive.

Recover Data - Pen Drive Data Recovery software is an easy & simple to use Data Recovery Software and Undelete Pen Drive Tool which do not require any specialized skills. Software consists of simple steps while recovering lost or deleted data as follows:
  • Plug the Pen drive in your Computer System using USB Port.
  • Install demo version of the software & run the software.
  • Software displays your Pen Drive or Disk.
  • Select your Pen Drive and proceed further.
Recover Data for Pen Drives Software is an advanced Pen Drive Data Recovery Tools that allows you to rescue, salvage & recover lost or deleted files and folders from crashed, inaccessible and corrupted USB media including USB pen drive, zip drive, memory stick, USB flash drives (compact flash, multimedia card, secure digital card, smart media etc.) and other similar data loss.

Baca Selengkapnya ....

Trick To Make Your PDF Files Speak

Posted by Unknown Kamis, 08 Maret 2012 0 komentar


How to Make Your PDF Files Speak to You.

This is an Interesting Trick i found in Adobe Reader. This works in Adobe Reader 7.0 through the latest

1. First of all Install Adobe Reader , if you haven’t already.

 
2. So first you go to View>Read out Loud> Activate Read Out Loud.

 
3. After you have done that just do this.

Now it will read it to you out loud in the Default Microsoft Sam voice.

Baca Selengkapnya ....
Trik SEO Terbaru support Online Shop Baju Wanita - Original design by Bamz | Copyright of android jones.